Saturday, February 21, 2015

Pasta e Fagioli… Our Family's 100+ Year Recipe for Pasta with Beans

Cranberry Beans a.k.a Bolotti Beans (:sigh:) oh how I love thee! So for many years (well maybe my entire life, but who's really counting anyway) my grandmother would always make this delicious meal which has been in my family for years… say like over 100 (crazy I know). Well the story goes something like this.  My great-great grandmother, Nonna, (yes that's right, two greats!) was making this since before my family came to America from Sicily.  As my grandmother accounts, Nonna used to go to the corner market and buy these beans by the bushel basket in order to make enough Pasta e Fagioli for their large family (10 children, mother, father, uncle, grandmother and grandfather) OMG! With no real recipe to be handed down, my grandmother used to watch her Nonna make this, and for years, has been making it for her family from memory. When I asked her to tell me how she makes it (I can't tell you how much I love this) she laughed and said other than her and her Nonna, I am the only other person that will know how to make it… that is until, I tell you all how to make it later on in this post. 

Before we get into it, here's a little ditty about cranberry beans.  Since I adore this meal so much (I think i've said that like 3 times already), I decided to give it a whirl and grow my own cranberry beans in my garden last year, as an experiment.  Let me tell you bob - these things grew like nobody's business! This year I am certainly going to grow them with the intention of making Pasta e Fagioli and succession plant them so that I have a constant supply throughout the summer - if I can manage and don't run out of room, I will plant enough to be able to dry some to get me through the winter months too!

So back to the beans. They are mild tasting and when they are fresh, their pod is green and pink/purple speckles and the bean inside is white with red/purple speckles (you will see in the picture below). You can find them this way at either farmers markets in the summer months, or sometimes find them in your local fruit and veggie store.  I have read, however not seen this with my own eyes, that you can find them dried in certain markets/health food stores, too!

"Thats all I have to say about that" (Forest Gump reference) - let's get cooking'!

You will need:
  • 3 lbs fresh cranberry beans in the pod (approximately 4 cups of shelled fresh beans and 2 cups of dried)
  • 1 onion
  • 1 stalk of celery (not one rib) with a lot of leaves on it
  • 2-3 cans of chicken broth (depends on how much evaporates while cooking)
  • 1 8oz can of tomato sauce (if you have your own canned from your garden, make sure it is completely smooth, no chunks of tomatoes)
  • 1 Box Ditalini pasta (cooked)
  • red pepper flakes (to taste)
To make:

Take all 3 lbs of your cranberry beans and give them a good washing while they are in their shell.  If you are using the dried version, soak them overnight to soften them. See how beautiful these pods are?! I just love them!

Now comes the fun part, shelling all of these beans - it sounds like it takes a long time but I had a cup of tea and by the time I was done with my tea, all of my beans were shelled! Make sure to check each bean…throw them out if there are any signs of mold!


Once you get them all shelled, this is what the beautiful beans will look like. Don't be fooled however - they don't stay all speckly and pretty once they are cooked - bummer I know!! Give them a rinse again.  In the picture on the bottom right, I am showing you that out of all of the beans in the shell, I only ended up with 4 cups after I shelled them.

Now, grab your onion and finely chop it.

Next, take your celery and cut off all of the leaves,  pull off the outer ribs of celery and there will be more leaves in the center or heart of the stalk…use those too. Coarsely chop the leaves and save the ribs of celery to make my Super Duper Chicken Souper later on in the week - prep once use twice?! The leaves of the celery add amazing flavor and sacrifice having to chew chunks of celery because that would just be weird in this dish!


Put a little bit of olive oil in a medium sauce pot and get the celery leaves and onions working. Once the onions become transparent, then add the tomato sauce, 1 can of chicken broth, and the beans. I also added about a tbsp of red pepper flakes here because I like mine HOT HOT HOT!  If the group you are feeding isn't into spicy foods, the red pepper flakes could be added to each serving when it's finished.


So now you basically mix it all together, give it a nice big stir, and bring it to a boil. Once its boiling, turn down the heat to a simmer and put a lid on the pot. They key to this recipe is "low and slow".  Keep adding chicken broth so that the beans are always covered with liquid (see the middle picture below). Simmer for two hours and by the end, your Pasta e Fagioli should look like the bottom picture.


Lastly, add the beans to your cooked Ditalini pasta and serve in bowls! Be sure to save a little bit of the pasta cooking water to use if the finished Pasta e Fagioli needs to be loosened a little bit. As you will see below, this is not the typical soupy type of Pasta e Fagioli that many restaurants serve - this is truly what the literal translation of the name says it is "Pasta with Beans" and I promise you… its delish!


And that's all she wrote (not literally, but ya know)! I topped mine with more red pepper (the hotter the better) and thats pretty much it.  It doesn't look like much but trust me, it tastes so good and has a ton of fiber and protein from the beans! Give it a try… I mean, after all - its been in my family for over 100 years and its still a family favorite meal!

Enjoy!

Danielle


Saturday, February 14, 2015

Homemade Butter Cream Frosting in 5 Minutes or Less!

So I think it's safe to assume…. cupcakes might just be the most tempting thing of life, don't you agree?! I can't seem to keep myself away from them no matter how hard I try. Even with the whole gluten sensitivity thing - I JUST CAN'T FIGHT IT sometimes! 

So you want to bake cupcakes at home… you buy the cake mix and frosting from the store, add a few ingredients from the refrigerator and poof! Homemade cupcakes - I THINK NOT! Did you ever stop and read what is in the frosting?? High Maltose Corn Syrup and a bunch of other preservative ingredients! Now I know you are like "well I buy it because its easy and quick" but let me tell you sister (or brother) the real thing can be made in a pinch and with ingredients you probably already have in your home! 

So today my friends, is the day…. the day to promise yourself to never, ever (ever!) buy store bought frosting again and simply whip up a batch of your own in 5 minutes or less!  Here we go!

You will need:

1 stick of butter (room temp)
4 1/2 cups of confectioners sugar (I didn't say it was healthy!)
1 1/2 tsp vanilla
5 tbsp milk (or cream but I use milk)

To make:

Take a mixing bowl and add the room temp stick of butter. I usually cut the butter into cubes because it is easier to work with. Use either a hand or stand mixer and whip the butter until it is nice and smooth then add the confectioners sugar, vanilla, and milk and mix with mixer until very smooth and creamy.  If you are thinking to yourself "Damn I wish she made a chocolate version" well I'm allergic to chocolate (criminal, I know) so I usually don't make things I intend to eat with chocolate, but if you want chocolate, I'd substitute 1/4 cup of the confectioners sugar with 1/4 cup of cocoa!


And that my friends is how you made butter cream and I promise you, its way better than the store bought stuff you used to use! Quick and easy, isn't it?!

Comment below if you give this a try or have questions related to the recipe!

Happy Valentine's Day and enjoy!
Danielle

Saturday, February 7, 2015

Valentine's Day Bunting

So one thing we love to do in our home is decorate for holidays. Our front entry way is perfect for decorating as it has a very large entry way into the living room and a staircase going up to the second floor - there are lots of decorating options here! Since the Christmas decorations came down, I was anxiously waiting to ramp up this area again for Valentines Day. After thinking about how I was going to decorate this space for Valentine's Day this year and my burning desire to make a bunting, I had a great idea - make a Valentine's Day Bunting (duh)! I have a thing for the rustic chic look so I knew I wanted to do something with burlap for this project, plus, I had a mess load of Valentine's Day fabric in my stash that was screaming to be used. After about an hour (really, its a quick project), I had made a super cute, shabby chic rustic bunting! If you are interested in this DIY, follow along - it's super easy and you don't even really need to use a sewing machine!

You will need:
burlap (I used a wide burlap ribbon)
natural fiber twine/string (I used burlap)
printed fabric
matching thread
sewing needles (one with an eye large enough for the fiber twine, one for the thread and 
    one long tapestry needle)
small piece of chalk (or pen)
scissors
straight pins
buttons (enough to place one every 10" of the final length of the project)

To make:

First lets start with the measurements! Measure the doorway or whatever you are going to hang your bunting along (a fireplace mantle would be lovely but we don't have one over our pellet burning stove). The doorway I used was 62"(measure in inches so that the math is easier). Once you have this number we are going to do the following calculations and cut to size:

  • The natural fiber twine/string: length of the area + 4"
    • Mine was 62" + 4" = 66"
      • Cut two of these lengths
  • Burlap: length of area x 2
    • Mine was 62" x 2 = 124"
  • Fabric: length of area x 3 
    • Mine was 62" x 3 = 186"
      • cut to the same width of the burlap
        • for me it was 7" wide
          • Make sure to mark the fabric using the chalk (or pen)
Now that you have all of the materials measured and cut, lets start to assemble. Take your natural fiber twine and thread it through a wide-eye sewing needle. At one end, measure 2" from the end and form a loop with the 2" piece. This will serve to help with hanging the finished product, as well as keep the twine from slipping through the burlap.


Here is a picture of the wide burlap ribbon I used (I found it at Michael's)


Now, sew long stitches (it doesn't have to be perfect) along the length of the burlap, about 1" from the edge. When you get to the end, with the last 2" of thread, tie another loop like the one you tied before.  At this point, your burlap will be nice and gathered. 


Hang it up to make sure it fits.  If you did the measurements correctly, the twine should be pulled tightly from end-to-end of the doorway/ space.


Super cute already, right? I forgot to mention, the way I designed this project was so that it is in two pieces and the holiday ruffled fabric will be interchangeable so that you can just take off Valentine's Day, make one for St. Patty's Day (and other holidays) and attach it to the burlap piece… cleaver, I know. In all seriousness, I hate to make the same projects over and over again so I wanted to make sure that this was a multi-use DIY.

Ok so now that you took all of 5 minutes to do that (I hope it didn't take longer), lets move on to the fabric ruffle.

My original piece of fabric was only two yards long so I had to cut multiple 7" strips until I had enough length per my calculations (it ended up being just under 3 pieces). If this is the same for you, just seam the strips together  (1/4" seam allowance) so that you have one really long piece of fabric that is the length that you calculated.

In the picture below, I showed you my chalk markings, this makes life so easy when you have to cut really long strips of fabric. So anyway, take the strip and fold right sides of the fabric together (the wrong side of the fabric will be facing outward) and pin together. You are going to sew 1/4" from the edge, either by hand or on your sewing machine, the entire length of the fabric.


Now comes the most annoying part of the whole project - turning the fabric right side out! Since my strip was like a gazmillion inches long, this got really old, really quick. So once you feed the fabric back through itself, get your iron and press both the fold and seam nice and flat. Some people skip steps like this but, I have to tell you, it makes a big difference. 

Once everything is pressed nicely, you are going to top stitch (if you don't sew, its just a fancy word for sewing on top of the right side of the fabric) the entire length of the fabric, 1/4" from the seam side. Once you sew all the way down, do the same thing again, 1/4" away from the stitching you just made. You will see what I mean in the picture below. You are making a pocket for my "I'm too lazy to make real ruffle stitches"  method lol. 


At this point, we are going to make this crazy long strip turn into the pretty ruffle in the lower corner of the picture above.  Take that second piece of twine but this time, thread it through the long tapestry needle. The reason that you want the long tapestry needle is because it becomes a pain to try and feed the twine through all of this fabric with a short needle. Once it's threaded, tie at knot again, 2" from the end like you did before. Now thread the twine in-between those two rows of stitches you made (its a little pocket for the string). Be careful not to loose the end of the twine when making the ruffles.  Since the fabric is 3 times longer than the string, things are going to get a little tight so be careful. Once you get to the end of the fabric, tie that loop again, with the last 2" of twine. Take some of that matching thread and quickly tack the end of the twine to the end of the fabric. This is so that the ends of the twine will never slip through the ruffle (even when you are storing it after the holiday).

For the last part… we are going to "sew buttons" (literally) and attach the two pieces together. Take your needle and thread and a button and sew to the very beginning of the burlap ruffle, right over the stitching you made with the twine. Then, sew one button every 10" from the previous button, for the length of the burlap - make certain to sew a button at the end of the burlap on the other side (you must have one button at each end)


Now, take pieces of twine and knot small loops (big enough to fit over the buttons but not so big it will fall off). Take your needle and thread and sew these loops to the fabric right where the twine is fed through, making sure to match them up with the buttons you sewed on the burlap. Once all of the loops are sewn on, loop them onto the buttons and poof - the two pieces are attached. 

I apologize for the blurry picture above, oops! And that's all she wrote.  Hang it up and enjoy! If you are ambitious, make more ruffles for other holidays. I intend on making a year-round shabby chic rustic bunting with the burlap and ivory lace ruffles!

I hope you enjoyed this tutorial!  If you make one of your own, please comment and tell me about it below. Also, if you have questions, comment below and I will be sure to answer them for you!

Happy DIY'ing

Danielle

Saturday, January 31, 2015

Homemade Kombucha

Some of you may be thinking "What the heck is kombucha?!" Others may be avid drinkers of the tea but either way, today I am going to teach you how to brew your own! I have to admit, when I first got into kombucha, I was only able to drink the favored versions that you can buy in the stores.  The bottled "original" kombucha (without flavoring) nearly put hair on my chest… oh my word - it was like drinking vinegar! So I stayed far away from the original stuff and stuck to my old faithful favorite - Syndergy Guava Goodness  by GT's Kombucha!

I was literally drinking this stuff like it was going out of style… 5-7 bottles per week! My husband started to get into drinking it as well but at just under $4 per bottle (and nearly $45/week just for myself) we were like its nuts to spend $90/ week for both of us to drink this stuff - no matter how delicious and beneficial it is! Thats when I got the bright idea (sometimes I get these crazy ideas and everyone thinks I am nuts) to make my own!

So for those of you who have no idea what kombucha is, it is a fermented tea with a ton of goodness for your body. So as with anything that is not considered to be the "norm" there are just as many articles about the benefits as there are about the dangers or myths about the stuff. There have been articles that indicate health benefits of helping with building the immune system and improving digestive health because of the beneficial bacterias (think something similar to Kefir or yogurt), and even improving energy. And then there are they nay-sayers posing an opinion that it could be harmful, etc., etc., etc.

So for the purposes of CYA (covering your (my)  arse) I will tell you that this post is truly my opinion, based on my experiences, and you should make this recipe with caution and at your own discretion (blah blah blah). As for the health claims, there has not been been a lot of  hard core research on the topic so, if you are like me, you are going on the reputation that has been created by those who have been drinking the stuff for many many years and feel that there is a true benefit to your health by drinking it. 

Fermented tea? What the…? Well basically kombucha is created after you brew a very strong and sweet tea that sits at room temperature with a SCOBY (symbiotic culture of yeast and bacteria) that looks like what some say a mushroom or to me, a beige jellyfish! So for any of you who have taken microbiology or who know a thing or two about fermented foods (hello sauerkraut and wine) basically adding the bacteria and yeast colonies to a tea with high sugar allows the bacteria and yeast to feed off of the sugar and boom - fermentation occurs and you are left with this delicious tea - in a nut shell. If you leave it too long, you will end up with a sort of vinegar (yikes)! If you are really into the whole science thing then go read up on how fermentation occurs but if not, just go with what I said lol.

I have to tell you, I have been making this stuff for quite some time now and have given it to many people to taste (people who are avid drinkers) and they absolutely rave about this recipe which makes me feel good - tried and true.  My husband and mother,as well as myself drink it religoiusly so I make mine in big, BIG,  batches. 

If you are wondering what it tastes like, its hard to describe but its pretty much like a tea that is sorta sweet with a little tang and fizz at the same time. The homemade version is much more mild than the original store bought and is easier to ferment to your liking. 

So if you haven't ran away in pure terror by this point and you are like "heck yeah I wanna try this" here is how I brew mine. 

Remember I make mine in big batches (3 gallons at a time) so that it lasts me two weeks (the length of the fermentation process) and I continuously have a supply. For the purpose of this recipe I will give you the measurements for making 1 qt at a time, but my pictures are based off of how I brew mine in 1/2 gallon jars so don't get confused - use the measurements!

You will need:
  •  2 Black or green teabags (you can also use loose leaf tea if you wish - make sure either version of the tea is UNFLAVORED) I've used both types and we prefer the black tea over the green. 
  • 1/3 cup of sugar 
  • 1 qt of water
  • a SCOBY (you can buy one from a reputable source or get one from a friend)
  • 1/2 cup of starter liquid (comes with a scoby if you buy it, get some from a friend or use original flavor store bought kombucha)
  • paper coffee filter or cheese cloth
  • qt size mason jar 
  • qt size bottle for finished product (make sure it is plastic or glass - NO METAL)
  • rubber band
  • plastic funnel
  • wooden (or plastic) spoon
  • a sauce pot (big enough to boil a qt of water in)
To make:

Get a pot of water boiling and sterilize your mason jar for at least 10 minutes (super important)! In another pot, boil 1 qt of water.  If you are using a water filter that filters out chlorine then bring the water to a boil and turn off.  If using tap water, bring the water to a boil and boil for an addition 10 minutes once boiling.

Once your mason jar is sterilized, set it on a pot holder on your work surface and grab your teabags and sugar.


I make my kombucha using all organic ingredients - you can use regular ingredients if you like. So this is the tea that I use… its from Whole Foods. The reason that I love this tea, other than that it is priced well for organic tea, is that it comes in teabags that do not have a staple in them. Call me crazy but one of my biggest pet peeves is the staple that holds the string on - why do we need to have metal in our tea!? 


This is the sugar that I use- you can use regular white granulated sugar if you wish.  If using organic sugar, make sure it is not turbinato sugar!

So take your tea bags and plop them in your sterilized jar.  Next, pour in the sugar like this (remember  I have more ingredients in my jar because I am making a larger batch than the recipe calls for)

By this time your qt of water should be done boiling. Very carefully pour the water into the mason jar but do not fill it all the way to the top -you want to leave at least 1/2 cup of space at the top. On the mason jars, there is a line just before the top - thats a good place to stop filling. 

Now you are going to want to stir, stir, stir until all the sugar is dissolved. Once that happens, place the coffee filter (or cheese cloth) over the top and secure with a rubber band like this


Put the coffee filter on with the teabags still in the jar?!? Yes! You want them to steep in there until the tea cools to room temperature - like I said before, this is a strong, sweet tea in the beginning. 

So now you are going to let this cool until room temperature. On a nice day (not when it's freezing like it is here at the moment) I will put these outside on my front porch to cool. I will tell you that if you are going to cool these outside, make sure to use the coffee filter rather than the cheese cloth and make sure the rubber band is secure (you don't want little bugs to go into the tea- they will be highly attracted to it because of it's sweetness). Sometimes the cooling process takes hours so be patient. 

Other kombucha brewers add the teabags and sugar to the pot of boing water which is fine too.  The reason I don't make mine this way is because I found that it takes much, much longer to cool in the hot metal pot!

Ok so once your tea has cooled, take off the coffee filter, remove the teabags with a wooden spoon and add the starter liquid.


From this point forward - no metal, whatsoever, should touch the kombucha! This is super important so be mindful of what you are using!

Now you are going to want to grab your SCOBY and add it to the jar.  Once it's added it will probably float around near the top.  If it sinks, don't worry, that is fine too.

Now, put the coffee filter/ rubber band lid back on and  place in a warm area (out of direct sunlight) for 10-14 days (this will depend on the temperature of the room).

I usually line up all of my jars (6 1/2gallon jars at a time) on top of my refrigerator. Now while it is fermenting, I suggest tasting it at the 10 day mark to see if it is ready. A new baby SCOBY will be forming on the top of the jar so be careful not to disturb it too much.  Take a straw and put it into the top of the jar and slide it along the side, put your finger over the top of the straw to put some kombucha into the straw, and give it a taste. 

NOTE: you should not have anything that resembles mold forming. If you do, throw away your kombucha immediately. I have been making mine for quite some time and have never had this because I meticulously follow the steps as I am giving you.

If all is good, take a taste. When it is ready (usually about 14 days for me but quicker if the kitchen is hot) it should taste sort of sweet with a little zing of tartness.  If it is really sweet and tastes like sweet tea with no tartness, it is not ready. Let it keep fermenting and taste it daily!  If you let it go too long you will end up with vinegar!! Don't let it get to this point!

So when it is ready, you will have the old SCOBY you started the tea with (some people call this the "mother") and a new SCOBY  (the "baby"). Here is what mine looked like after the two weeks. 

Take out both the new and the old SCOBYs from the team and put them in a glass or plastic container with enough of the kombucha liquid that you just made, to make another batch of kombucha at another time.  Now, this is where this gets fun… for every batch of kombucha you make, you will make a new scoby. So you started with one, and one grew in the brew you just made, so now you have two SCOBYs. This means you now can make two batches on the next brew - and so on and so on, for each jar you have going. At one point I ended up with 18 SCOBYs at the end of a brew because I had two in each jar because I had big and little jars going all at the same time!

Remember, you need to save 1/2 cup of liquid per SCOBY to make new qt batches. Once you have enough starter liquid and SCOBYs, you can move up from qt jars to 1/2 gallon jars if you wish (just adjust the measurements for the 1/2 gallon size jars - you will calculate all of the ingredients for this size jar including the starter liquid but you will only need 1 SCOBY no matter what the size of the jar is). It may take you a few brews to get to this point, but be patient… it happens pretty quickly once the SCOBYs and liquid start piling up. This is what people call a "SCOBY Hotel". Put a lid on the container and put it in the refrigerator until you are ready to brew again! 

Now for the bottling part. You will need a jar with a lid and a funnel.  These are the types of jars I use. 


You are probably like "she said no metal from that point on and that lid has metal". While that is true, the inner part of the lid is lined with silicone and therefore, the metal will not touch the kombucha :) The top bottle is an glass milk jar from a previous milk purchase - I decided to lose my deposit on the jar because it would make a great kombucha bottle. 

Put the funnel into the bottle and slowly pour in your kombucha. If you pour too quickly you will make a foamy overflow mess because there is some carbonation in the kombucha. Put the lid on and store it in the refrigerator! If you aren't going to have some 'bucha for a few days, open the lid and put it back on - you don't want too much pressure to build up in the jar because it could explode (this never happened to me but i've heard it can). 

And thats pretty much all she wrote. When you are ready to drink, pour it into a glass and enjoy it.  Some sediment on the bottom of the bottle is normal (there may also be stringy little bits floating around) - because its kind of gross to drink, even though it is harmless, put a plastic (or glass - no metal) fine strainer (some people use cheese cloth) over the top of the drinking glass and pour the kombucha over it to eliminate some of the sediment and enjoy!!


Just a few notes:
  • How do you have a continuously supply? Once I bottle a batch I immediately start the process over again this way we continuously have kombucha to drink. If you wait until you drink all of the kombucha to brew again, you are going to be kombucha-less for two weeks while you are waiting for the new batch to ferment and you will be sad :(
  • Why do we brew 3 gallons at a time? Well there are 3 of us drinking it (8-10 oz per day) everyday for two weeks while the next batch is brewing, so we have to make a ton of it to get us through the two weeks. Also, we like sharing/ bartering it with some of our friends so we need extra for that on occasion. 
  • Why no flavored teas?  Well often times the flavored teas do not allow for fermentation to happen properly because of oils and artificial flavorings. Some people do use flavored teas and have it work well for them but I don't feel too comfortable doing it so I stay away.
  • Can I flavor it? Yes you can, its called the second fermentation  process and there are many videos on this on YouTube for you to check out.  In our house, we don't bother since we love the plain kombucha we brew. 
  • Why no metal after you add the starter liquid?  The metal creates a reaction and alters the fermentation process - not a good thing.
  • What if I am scared to brew my own? If you are scared to brew your own - health food stores sell it pre-bottled. Although it is expensive, it is mighty tasty!
  • Isn't that a lot of sugar? Well yes, to start with, but the sugar content decreases during the fermentation process so its not as sugary as you would think.
  • Where did I get my first SCOBY? I didn't have any friends that were brewing their own so I had to buy mine online.  I did some researching and found that Savvy Teas and Herbs had organic SCOBYs and had quite a great reputation. This is what I started out with. Also, Kombucha Brooklyn is another company I've heard great things about. I am a firm believer in not using the dehydrated SCOBYs that are out there!
Well thats pretty much it.  It may sound scary to brew our own but I have to tell you…my experiences have been great, with no problems, and gave me the ability to make 1 gallon of kombucha for about $4 (it is cheaper if you don't use organic ingredients) compared to spending $4 for a 12oz bottle! I did do a lot of research and YouTube video watching (reputable brewers of course) before I started making my own but thats just the way I am.

If you give it a try, let me know in the comments below. Also, feel free to comment with any questions and I will try to answer them the best I can. 

Happy 'bucha brewing!
Danielle

Disclaimer: As mentioned before, since there have been cautions against brewing your own, this recipe is to be made at your own discretion and I am not liable for any adverse outcomes that can come of brewing your own! Also, I am not sponsored by any of the brands/companies mentioned in this posting.  These are companies that I have used in the past and are those that I prefer. Always consult with your doctor before taking. 

Tuesday, January 27, 2015

Elderberry Cold and Flu Syrup

It's no surprise, cold and flu season is in full swing and its been one heck of a season thus far! It is only natural, that during the cold and flu season, I post about elderberries, ginger, cinnamon, cloves, and honey in my Elderberry Cold and Flu Syrup

Elderberries are filled with vitamins C and A, beta carotene, iron, and potassium. These little berries are immune-enhancing and antiviral, which make them great for warding off colds or the flu, and upper respiratory symptoms. Ut-oh be sure to only consume cooked, fully ripened berries as the berries and stems can be toxic! Always get your supply from a reputable source.

Ginger is an herb that many people are familiar with but sometimes over look it's healing properties. Ginger has been shown to reduce inflammation and works as a decongestant!

The same goes for cinnamon - most people use it for cooking but may not know it has antiviral, antiseptic, and antifungal properties, as well as aids with congestion. Word to the wise - cinnamon can stimulate the uterus and should not be used during pregnancy! Who knew?!

Cloves aren't just for baking! Like the above mentioned herbs, they have antiseptic, antispasmodic and antifungal properties!

Lastly, many of you may have been given a spoonful of honey as a child, by your parents or grandparents, to help stop a tickling cough. Although the thickness is wonderful at creating a nice coating on you throat (and it tastes fantastic) it too, has antiviral and antifungal properties (see where we are going here?!). Although many think honey is harmless, it should never be given to children under one year of age!

So now that we know all of the good stuff about the ingredients in the Elderberry Cold and Flu Syrup, lets get to the recipe!

You will need:
1/2 cup dried elderberries or 1 cup frozen berries
1 cup honey (I prefer raw honey but regular will do too)
5 cloves
1 tbsp fresh grated ginger or 1 tsp ginger powder
1 cinnamon stick or 1/2 tsp cinnamon powder
2 cups filtered water
a fine mesh strainer (or cheese cloth)
jars for storage

To make:

In a small pot, add elderberries, cloves, cinnamon, ginger, and water. If you can not find dried elderberries, i've been told that health food stores sell elderberries in the frozen foods department with all of the other frozen fruit. I get my dried elderberries from Mountain Rose Herbs (I LOVE LOVE LOVE this company!)


Once everything is added to the pot, you are going to want to bring it to a boil. Once boiling, cover with a lid, reduce to a simmer for 20 minutes or until it is cooked down to half of the liquid you started with (it could be sooner or longer depending on your simmer-age).


In the bottom picture above, you will see that I cooked mine down a little more than half way - I am bad at estimating. While the ingredients were simmering, every now and again take your wooden spoon and smash the berries. Don't worry about trying to make sure you smash all of them, just a little squish here and a little squish there will suffice (you don't even have to do this if you don't want to - it just made me feel like I was helping them do their job).

So once you determine what half of the liquid looks like, take your strainer (or cheese cloth) and place it over a bowl. Gently, and I mean gently (this will stain if it splatters) pour the ingredients through the strainer - take the wooden spoon and gently press the berries while they are in the strainer to make sure you get all of the juice out of them. Discard them (or compost them if you have a compost heap) when you can't squeeze out any more juice.  Repeat this until the pot is empty.  I then take my liquid and strain it again into another bowl because you want to make sure that there weren't any little bits that were able to sneak through the strainer. 

Now comes time to add the honey. If you are thinking to yourself, "why didn't we add the honey before?" well thats because you do not want the boiling process to cook out all of the goodness from the honey. Before you add the honey, test the liquid to make sure that it isn't hot - you want it to be warm or cool (110 degrees F or lower if you want to get technical) before adding the honey in. Once the liquid is ready, pour in the honey and use a spatula to gently mix it in.

Keep stirring until you feel like all of the honey has been completely mixed in. It took me about 2 minutes to get to this stage. At this point you are probably thinking you did something wrong because this isn't as syrupy as you thought it would be… well you didn't do any thing wrong, this is supposed to be a thinner syrup! Now you can pour your finished syrup into any type of bottle you choose.  Since I have a self-admitted obsession with mason jars, that is what I used.  

I ended up with 1 2/3 cups of syrup when I was done… I divided it into two mason jars. You may have less or more, depending on that whole simmering down process. You should not end up with more than 2 cups because if it is more, you didn't cook down the liquid enough. No big deal though, your syrup just may not be as potent but it is still useable!

Just a few notes:

  • This must be refrigerated! It should store in the refrigerator for a few months. If it smells differently from when it was first made, toss it!
  • Children under 1 year of age should not consume this because of the honey.
  • How much to take? Well, there really isn't a dosage since these herbs are not harmful but it has been widely recommended to take 1 tbsp per day for immune support for adults and 1 tsp for children. For active symptoms, this can be repeated about every 3 hours until the symptoms lessen or resolve completely. 
  • Disclaimer - always consult your health care provider prior to using (both pregnant and non-pregnant readers)
Stay happy and healthy!
Danielle

Reference
Gladstar, R. (2012). Rosemary Gladstar's medicinal herbs. North Adams, MA: Storey Publishing. 

Saturday, January 24, 2015

Peppermint Patty Lip Balm

Although a nice soothing lip balm is a cold weather necessity, if you are like me, it is a year round addiction! For many years, I was a lover of all different types of lip balms (Chapstik brand, E.O.S., and Carmex were with me at all times).  Over the past two years, I have really began to look at the ingredients in the products I was using, especially my lip balms - hello petroleum jelly! Yea…. when I looked at the products I was using on my lips, I realized that 98% of them contained petroleum jelly. Now  I know you are probably thinking to yourself… whats so wrong with that? Well here is why I don't really care for it - its a by-product of making gasoline! I don't know about you but I don't want that anywhere near my mouth, regardless of whether or not  the "bad stuff" is removed, as many companies claim. So the second reason is that people have the misconception that they are sealing in the moisture when they apply petroleum jelly products to their skin but the misfortune is that you are also blocking moisture from getting in and creating a barrier in which you skin can't breathe - might as well put plastic wrap on your lips and call it a day.

So all of this nonsense about petroleum jelly lead me to look for better alternatives, such as Burt's Bees.  I have been of a lover of both bees, and Burt (and Ernie -hehe) from like birth. Naturally, I fell in love with Burt's Bees products, especially their lip balms because they are made with natural products. I mean hell, I love Burt's Bees products so much I even watched the documentary on Netflix (nerd, I know, but it was actually really good). 

So anyway, fast forward to this past year and I have been constantly thinking of ways to DIY everything under the sun, including all of my favorite beauty and skin care products.  This is where the idea for making my own lip balm came in. I thought about it and figured why spend $3.50 per tube of Burt's Bees (I literally have lip balms all over the place so this number is like times 10) when I can make my own for a fraction, yes fraction of the price. 

If you are thinking to yourself… "girl (or boy) you are out of your mind thinking you can make a lip balm just as good as Burt's Bees" well think again Tonto - it's super easy and takes less than 30 minutes. 

You will need:

a double boiler (i'll tell you how I make mine)
1 tbsp of Cocoa Butter (I use it in wafer form)
1 tbsp of Beeswax (I use it in pastilles form)
1 tbsp of Coconut Oil
6 empty 0.15 oz lip balm tubes with lids
20 drops of Peppermint Essential Oil (not fragrance or flavoring - there is a big difference)
a wooden skewer

To make:

Get your double boiler ready. Fill the bottom pot 1/3 of the way with water or enough water so that it won't touch the top bowl when boiling.  If you do not have an official double boiler, do what I do - take a small sauce pot and find a bowl that will sit inside of it, just a little. For me, the bowl I use is a pyrex (make sure it is a glass or ceramic bowl). You will see my setup in the pictures below. Start to boil your water and once boiling, turn it down to a very gentle boil.
Also, this is a good time to get your pouring area and tubes ready.  For this, take a piece of wax or parchment paper (for easy clean up in case you are messy) and line up your empty tubes. You will see in the picture below, I put all of my tubes in a two piece lid from a ball jar just so they are all in one little spot - you do not have to do this, it is just my preference - you can use something else that is small and flat to line them up on.

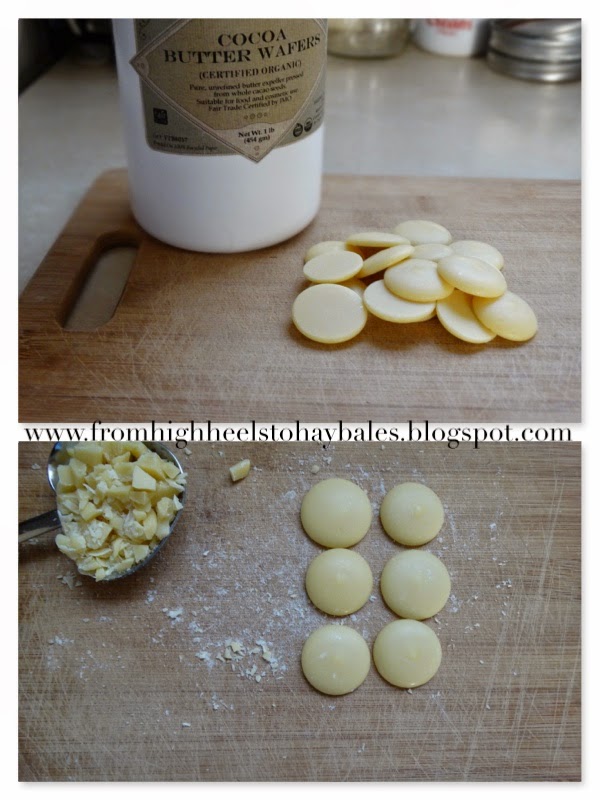
Next, if you are using cocoa butter wafers like I use, you are going to want to cut them up into pieces the same size as the beeswax pastilles (if you are using them). To make measuring easy and avoid using a kitchen scale, we use measuring spoons and not ounces like many recipes. You will need to measure out 1 tbsp of chopped cocoa butter.  It is super important that the cocoa butter and beeswax pieces are the same size!  Your cocoa butter should look like this.
Now measure out your beeswax pastilles.  If you aren't using pastilles, chop up your hunk of wax to be the same size as your chopped cocoa butter. 
Now, add your coconut oil - 1 TBSP worth.  If you haven't caught on already, we are doing a 1:1:1 ratio of the three ingredients… It makes for the perfect consistency!
To make things easier, I dump my ingredients into two-piece Ball jar lids for easy slide-off-ness (!?!?).  You can do what you feel most comfortable doing.

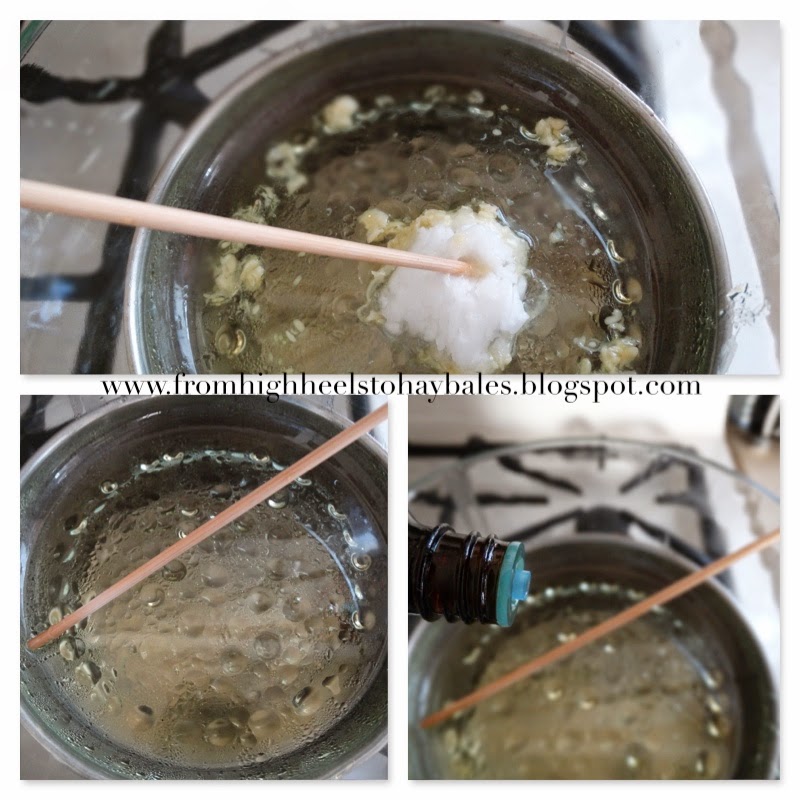
So now that your pot is boiling, start to add the ingredients into the top portion of the double boiler like this. I add the coconut oil last.
Watch carefully because these little guys melt quickly! You are going to want to grab your wooden skewer and start stirring, continuously. The reason I use a wooden skewer is so that cleanup is easier - just throw the darn thing away rather than having to wash another spoon. Once all the ingredients are melted, you are going to want to add the peppermint essential oil.  You should have something like this.
Now comes the tricky part… filling the tubes and not making a mess! Turn off the heat and move your bowl close to where you will be filling the tubes. Careful - this liquid is HOT! Take a small spoon (I use those heart shaped measuring spoons in the pictures above because the bottom of the heart serves as a spout of sorts) and spoon in the liquid into the tubes, filling them to the point where they are about to overflow. You will want to fill rather quickly because the liquid will start to solidify - but no worries, if it does solidify or thicken, just put it back on the double boiler and melt it back down. Also, don't worry about wiping up spills on the tubes, you can fix that once they are completely cooled. If you measured your ingredients correctly, you will have just enough for 6 of the 0.15 oz tubes (these tubes are the common lip balm tube size). 
Some people recommend doing the spoon test - you put a few drops of the melted liquid onto the back of the spoon and put it into the freezer for 3 minutes to see if it is the right consistency.  If you follow my measurements, you do not need to do this step since we know it will solidify to the right texture (trust me on this).

Once they are all filled, give the Ball jar lid (or whatever you have them on) a little, very little, shake/tap to make sure that all of the air has escaped.

While the ingredients are still liquid in the bowl of the double boiler and the spoon, take a dry paper towel and wipe the liquid out of the bowl and off of the spoon. You want to make sure that you get as much of the residue out of the bowl before washing - it will solidify in your sink pipe and you will hate yourself for not doing this step!

Now back to the lip balms… you should not move them, touch them, or even look at them for at least 2 hours - fight the temptation!  Once they are completely cooled, the color will go from transparent to opaque and should be a nice off-white color. Now, it is time to put the lid on and clean up any drips that are on the outside of the tubes.  To do this, take a dry paper towel and rub it on the outside of the tube - you may need to use your nail in some cases. You can either leave them label-less or make your own cute label and slap it on! For me, there is something special about handwriting the label for things you hand make, right? 

So here is the final product - it feels amazing on the lips and smells so good you will want to eat it (and you could if you really wanted to because all of the ingredients are food grade safe - exciting, I know)!
Just a few notes:

  • There are many different ways to make balms depending on the texture you like.  For me, I like a semi-firm yet creamy texture. This recipe will give you that kind of finished  product. If you like a very firm balm, increase the amount of beeswax and decrease the amount of coconut oil and vice versa if you like a really soft balm.
  • If you are not keen on peppermint, you can use other essential oils - I think orange would be lovely and will be in my next batch… I'm thinking of calling it Creamsicle or something like that. 
  • If you do not want to buy tubes, no worries, just save any small containers that you come across. This recipe makes about 1 fl. oz. worth of product so just go from there. Hey, if you use up a tin or little pot of lip balm, clean it out and put the one you make in there! Reduce, reuse, recycle (my mantra)!
  • I bet you want to know what the cost was per tube, don'tcha? Well it was $0.15 per tube!! And, to make it even better, I used all organic ingredients (except for the essential oils) so that means if you do not care organic vs. non-organic, you can make this even cheaper! Yea, I know, it's like the heavens started singing when you heard that!
And that my friends, is all for now! If you give it a try, please comment below and let me know how yours turned out!

Happy lip balm'ing!

Danielle