So all of this nonsense about petroleum jelly lead me to look for better alternatives, such as Burt's Bees. I have been of a lover of both bees, and Burt (and Ernie -hehe) from like birth. Naturally, I fell in love with Burt's Bees products, especially their lip balms because they are made with natural products. I mean hell, I love Burt's Bees products so much I even watched the documentary on Netflix (nerd, I know, but it was actually really good).
So anyway, fast forward to this past year and I have been constantly thinking of ways to DIY everything under the sun, including all of my favorite beauty and skin care products. This is where the idea for making my own lip balm came in. I thought about it and figured why spend $3.50 per tube of Burt's Bees (I literally have lip balms all over the place so this number is like times 10) when I can make my own for a fraction, yes fraction of the price.
If you are thinking to yourself… "girl (or boy) you are out of your mind thinking you can make a lip balm just as good as Burt's Bees" well think again Tonto - it's super easy and takes less than 30 minutes.
You will need:
a double boiler (i'll tell you how I make mine)
1 tbsp of Cocoa Butter (I use it in wafer form)
1 tbsp of Beeswax (I use it in pastilles form)
1 tbsp of Coconut Oil
6 empty 0.15 oz lip balm tubes with lids
20 drops of Peppermint Essential Oil (not fragrance or flavoring - there is a big difference)
a wooden skewer
To make:
Get your double boiler ready. Fill the bottom pot 1/3 of the way with water or enough water so that it won't touch the top bowl when boiling. If you do not have an official double boiler, do what I do - take a small sauce pot and find a bowl that will sit inside of it, just a little. For me, the bowl I use is a pyrex (make sure it is a glass or ceramic bowl). You will see my setup in the pictures below. Start to boil your water and once boiling, turn it down to a very gentle boil.
Also, this is a good time to get your pouring area and tubes ready. For this, take a piece of wax or parchment paper (for easy clean up in case you are messy) and line up your empty tubes. You will see in the picture below, I put all of my tubes in a two piece lid from a ball jar just so they are all in one little spot - you do not have to do this, it is just my preference - you can use something else that is small and flat to line them up on.
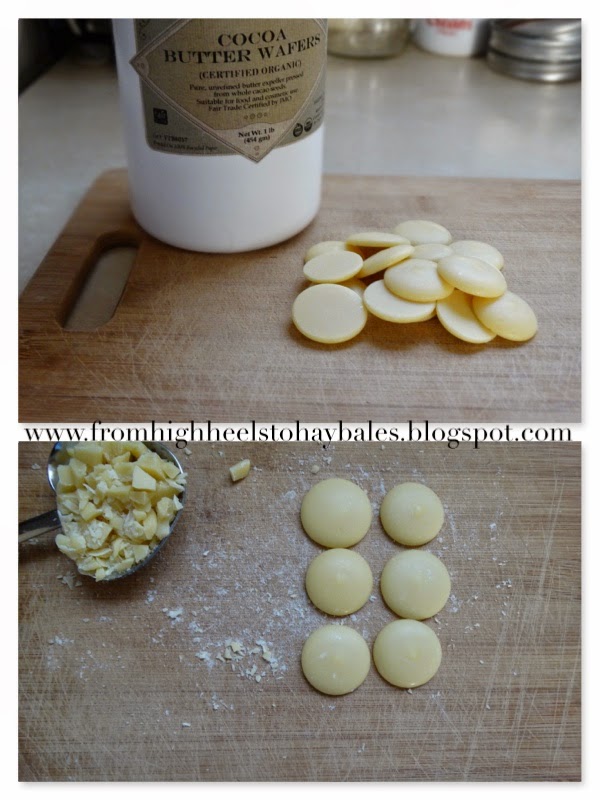
Next, if you are using cocoa butter wafers like I use, you are going to want to cut them up into pieces the same size as the beeswax pastilles (if you are using them). To make measuring easy and avoid using a kitchen scale, we use measuring spoons and not ounces like many recipes. You will need to measure out 1 tbsp of chopped cocoa butter. It is super important that the cocoa butter and beeswax pieces are the same size! Your cocoa butter should look like this.
Now measure out your beeswax pastilles. If you aren't using pastilles, chop up your hunk of wax to be the same size as your chopped cocoa butter.
Now, add your coconut oil - 1 TBSP worth. If you haven't caught on already, we are doing a 1:1:1 ratio of the three ingredients… It makes for the perfect consistency!
To make things easier, I dump my ingredients into two-piece Ball jar lids for easy slide-off-ness (!?!?). You can do what you feel most comfortable doing.
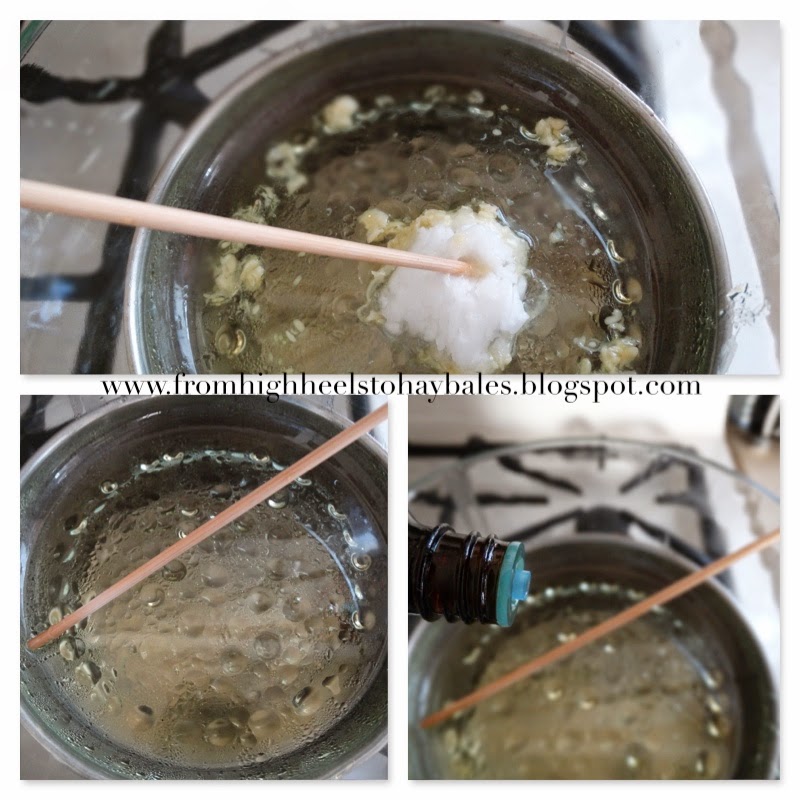
So now that your pot is boiling, start to add the ingredients into the top portion of the double boiler like this. I add the coconut oil last.
Watch carefully because these little guys melt quickly! You are going to want to grab your wooden skewer and start stirring, continuously. The reason I use a wooden skewer is so that cleanup is easier - just throw the darn thing away rather than having to wash another spoon. Once all the ingredients are melted, you are going to want to add the peppermint essential oil. You should have something like this.Now comes the tricky part… filling the tubes and not making a mess! Turn off the heat and move your bowl close to where you will be filling the tubes. Careful - this liquid is HOT! Take a small spoon (I use those heart shaped measuring spoons in the pictures above because the bottom of the heart serves as a spout of sorts) and spoon in the liquid into the tubes, filling them to the point where they are about to overflow. You will want to fill rather quickly because the liquid will start to solidify - but no worries, if it does solidify or thicken, just put it back on the double boiler and melt it back down. Also, don't worry about wiping up spills on the tubes, you can fix that once they are completely cooled. If you measured your ingredients correctly, you will have just enough for 6 of the 0.15 oz tubes (these tubes are the common lip balm tube size).
Some people recommend doing the spoon test - you put a few drops of the melted liquid onto the back of the spoon and put it into the freezer for 3 minutes to see if it is the right consistency. If you follow my measurements, you do not need to do this step since we know it will solidify to the right texture (trust me on this).
Once they are all filled, give the Ball jar lid (or whatever you have them on) a little, very little, shake/tap to make sure that all of the air has escaped.
While the ingredients are still liquid in the bowl of the double boiler and the spoon, take a dry paper towel and wipe the liquid out of the bowl and off of the spoon. You want to make sure that you get as much of the residue out of the bowl before washing - it will solidify in your sink pipe and you will hate yourself for not doing this step!
Now back to the lip balms… you should not move them, touch them, or even look at them for at least 2 hours - fight the temptation! Once they are completely cooled, the color will go from transparent to opaque and should be a nice off-white color. Now, it is time to put the lid on and clean up any drips that are on the outside of the tubes. To do this, take a dry paper towel and rub it on the outside of the tube - you may need to use your nail in some cases. You can either leave them label-less or make your own cute label and slap it on! For me, there is something special about handwriting the label for things you hand make, right?
So here is the final product - it feels amazing on the lips and smells so good you will want to eat it (and you could if you really wanted to because all of the ingredients are food grade safe - exciting, I know)!
Just a few notes:
- There are many different ways to make balms depending on the texture you like. For me, I like a semi-firm yet creamy texture. This recipe will give you that kind of finished product. If you like a very firm balm, increase the amount of beeswax and decrease the amount of coconut oil and vice versa if you like a really soft balm.
- If you are not keen on peppermint, you can use other essential oils - I think orange would be lovely and will be in my next batch… I'm thinking of calling it Creamsicle or something like that.
- If you do not want to buy tubes, no worries, just save any small containers that you come across. This recipe makes about 1 fl. oz. worth of product so just go from there. Hey, if you use up a tin or little pot of lip balm, clean it out and put the one you make in there! Reduce, reuse, recycle (my mantra)!
- I bet you want to know what the cost was per tube, don'tcha? Well it was $0.15 per tube!! And, to make it even better, I used all organic ingredients (except for the essential oils) so that means if you do not care organic vs. non-organic, you can make this even cheaper! Yea, I know, it's like the heavens started singing when you heard that!
And that my friends, is all for now! If you give it a try, please comment below and let me know how yours turned out!
Happy lip balm'ing!
Danielle


No comments:
Post a Comment